This tutorial will
show you how to do a basic retouch, change the colorcast of an image and
colorize some of its elements.

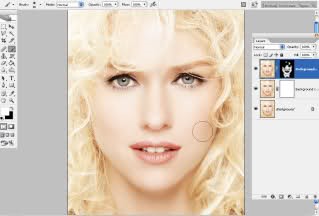
Duplicate the layer then go to Filter -> Noise -> Median...and enter a value of around 3 pixels. Then go to Filter -> Blur -> Gaussian Blur... and enter 5 pixels.
Step 2. Add a layer mask (by pressing the third button on the lower part of the Layers Palette) to the layer you have just blurred and fill it with black. Then pick a soft, medium sized brush and start painting with white on the layer mask. Make sure you avoid any lines on the face; use it only on the skin, to get a smooth, professional effect. Vary the brush size and opacity depending on the area. Avoid blurring the eyes, lips or hair.
After you finish this step, you should get something like this:

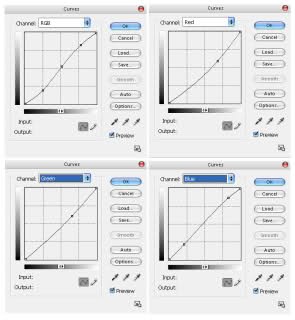
Step 3. Add a Curves adjustment layer with the following settings:
Step 4. Add a Selective Color adjustment layer with the following settings then fill its mask with black.
Reds: -55 0 0 0
Neutrals: -20 +15 –40 +5
Now paint with white over the lips and you will notice they’ll turn a light pink. Make sure you follow the edges of the lips properly.
Step 5. Add another Selective Color adjustment layer with these settings:
Yellows: -100 0 0 0
Whites: 0 0 0 –25
Neutrals: +20 –10 –50 +8
Fill its mask with black and carefully paint with white over the eyes.
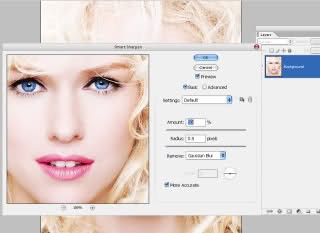
Step 6. Go to Layer
-> Flatten Image, then to Filter -> Sharpen -> Smart Sharpen...
and use the following settings:

Finally, go to Image -> Canvas Size… and choose black as a color, 40 pixels for both Width and Height to add a stylish outer border.
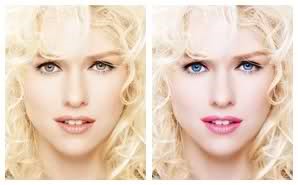
The final result:

Thanks for read this article "Photoshop Tutorials #1 : Basic retouch and colorization"
May be useful, and good luck !!
Source article : i43.tinypic.com \\ date access : Apr 20, 2009
Photoshop Tutorials #1 : Basic retouch and colorization
 Reviewed by Maulpetru
on
9:17 PM
Rating:
 Reviewed by Maulpetru
on
9:17 PM
Rating:


![[TERBARU] Cara Mudah Setting Wifi : Setting WIFI TPLINK dan DLINK](https://blogger.googleusercontent.com/img/b/R29vZ2xl/AVvXsEiXsSQRrzi-dVTwFsCxK8V3Vt8ZEI8wH_kj6VIjnWl1JzOF-vV1UCdUnakE8c60BO_pU-U91Dee9808WlkGkl0R5g94fS4AMdt8rV79c2onV0RhazFJ0Lcybe5UfXbiutLNaSq2ys9FGrE/s72-c/pos2_img_1.jpg)
No comments: